Buckwheat Waffles – Gluten Free


I really love these whole grain waffles. Buckwheat flour adds a different flavor from most waffles. They have a lovely crisp outer texture and are soft inside. They are also gluten-free.
Buckwheat waffles have a savory side that makes them a nice base for sandwiches, in place of bread. Dressed up with butter and syrup, they still work for breakfast or brunch. If I have some leftover, I will cube them up and use as croutons on a salad.
So, if you are looking for something different, why not give buckwheat waffles a try?
Here is the recipe.
Buckwheat Waffles
1 cup of buckwheat flour
1 egg
1 cup of milk
1 tsp. baking soda
1/2 tsp. baking powder
1/2 tsp. salt
1/2 cup of sour cream
3 tablespoons of cooking oil or melted butter
Combine all ingredients. Cook in preheated waffle iron that has been oiled or sprayed with non-stick cooking spray.
Lentil Lover

Lentils are one of those humble ingredients that don’t get enough love. They are so versatile. They cook quickly, can be used in all sorts of dishes, are very nutritious and are relatively inexpensive. They also come in a number of different colors, with each type of lentil having different qualities. I like that they cook quickly compared to most other dry beans and peas. Here is some information on types of lentils and some of my favorite lentil recipes, too. Enjoy.
French Green Lentils
French green lentils, also called Puy lentils, have a thicker seed coat than green or brown lentils and are smaller and rounder. Their seed coat helps them maintain their shape, so they are a go-to for salads, side dishes and grain bowls.
Beluga Lentils
Beluga lentils, also called black lentils, are named after the caviar they resemble when cooked. They are the most nutritious variety of lentils, with a hearty flavor similar to that of black beans. Beluga lentils keep their shape when cooked, making them perfect for any dish where you want the individual lentil to stand out with a visual impact like a side dish or salad.
Green and Brown Lentils
These types of lentils are common: these are the lentils you are most likely to find in your local grocery store. These flat lentils cook quickly and become soft, making them to go-to for lentil soup. You may want to puree some of the soup to make it extra creamy but it’s not a must like it is for bean soups.
Red/Yellow/Orange Lentils
Red/yellow/orange lentils are sold split, which allows the lentils to cook really fast—like 5-10 minutes fast. They lack a seed coat, so they lose their shape and achieve a smoother consistency than any of the other lentil varieties. Masoor dal is what red and orange lentils called at Indian markets, and they are used in soupy curry recipes. Chana dal refers to yellow dal and it is also used in soups and curries. A favorite recipe is Harira, a thick soup made with chickpeas and red lentils. While yellow lentils look a lot like yellow split peas, they are not the same. If I want to thicken a soup without adding flour, I add red lentils and let them cook until they fall apart.
Chili Bean Spoon Bread
½ lb. lentils
pinch of ground cloves
2 c. milk or milk substitute
1/2 t. salt
2/3 c. cornmeal
4 T. butter
4 eggs
4 T. oil
2 large onions, chopped
1 clove minced garlic
1 T. chopped parsley or 1 t. parsley flakes
1 T. chili powder
1 t. ground cumin
1 (14 oz.) can diced tomatoes, undrained
salt and pepper to taste
In saucepan, cover lentils with about 2 cups water and add cloves. Bring to a boil, turn down to a simmer and cook, covered, until lentils are tender, about 20 minutes. You may need to add a little more water. Meanwhile in another saucepan heat milk and salt almost to boiling. Stir in cornmeal and continue cooking, stirring constantly until thickened. Remove from heat. Stir in butter and eggs and set aside. In oil sauté onions and garlic until tender. Add seasonings, tomatoes and lentils and heat until bubbly. Adjust seasonings. Pour lentil mixture into greased 2-quart casserole dish. Spoon over the cornmeal mixture. Set casserole dish in larger pan and add 1 inch of hot water to larger pan. Bake in a 350-degree oven for 30-40 minutes, or until bread is firm and golden. Serves 4-6.
Lentil Chili
2 c. raw lentils
2 large onions, chopped
4 cloves garlic, minced
2 T. oil
1/3 c. chili powder
1 T. cumin
½ t. cayenne pepper or to taste
6 c. water
3 c. vegetable or chicken broth
1 28 oz. can tomatoes, chopped
1 red pepper, seeded and chopped
1 c. fresh or frozen corn
2 medium zucchini, diced
2 T. Worcestershire sauce, or to taste
Salt and pepper to taste
Rinse lentils and set aside. Heat oil in large kettle and cook onions and garlic until onions are tender. Add seasonings, water and lentils and cook, uncovered until the lentils are tender, about 20 minutes, adding more water if needed. Add broth, tomatoes and corn and simmer 15-20 minutes longer. Add zucchini and Worcestershire sauce, season with salt and pepper as needed and cook 15 minutes more. Serves 6-8.
Vegetarian Tacos
2 T. oil
1 large onion, chopped
2 c. cooked lentils
1½ c. cooked brown or white rice
1 envelope taco seasoning (about 1 1/2 oz.)
12 corn taco shells
2 c. chopped tomatoes
1 1/2 c. chopped sweet pepper, any color
1/2 c. chopped onion
1 1/2 c. chopped lettuce, I like Romaine
2 c. shredded cheese, optional or cashew cheese, see page 10.
Heat oil in skillet and cook onions until tender. Add lentils, rice and seasoning mix and heat until browned. Warm taco shells in a 350-degree oven for about 3 minutes. Spoon in a little of the lentil mixture in a warmed shell and add whatever toppings you like. Makes 12, serving 4-6.
Note: You can also use fresh tortillas in place of the taco shells and make into soft tortillas.
Note: For 2 cups of cooked lentils you need a scant cup of raw lentils. Rinse then simmer in lightly salted water until tender, about 20 minutes.
Lentil (Dal) Soup
8 c. water
1 ½ T. ground turmeric
1 T. ground coriander
3 bay leaves
2 garlic cloves, minced
½ t. cayenne pepper
2 2/3 c. Lentils, rinsed (about 1 pound)
¼ c. olive oil
1 large onion, chopped
1 t. fresh minced ginger
1 t. cumin seed
½ t. mustard seed
2 T. fresh lemon juice
Salt to taste
Lemon wedges
Bring first 6 ingredients to boil in large pot. Add lentils; reduce to a simmer and cook, covered, until lentils are tender, about 45 minutes. Meanwhile, in skillet over medium heat cook onions and seasonings in oil until onion starts to brown, about 10 minutes. Stir in lemon juice. Add this mixture to lentil mixture and cook until soup reaches desired consistency. Add salt to taste. Serve in bowls and garnish with lemon wedges. Serves 8.
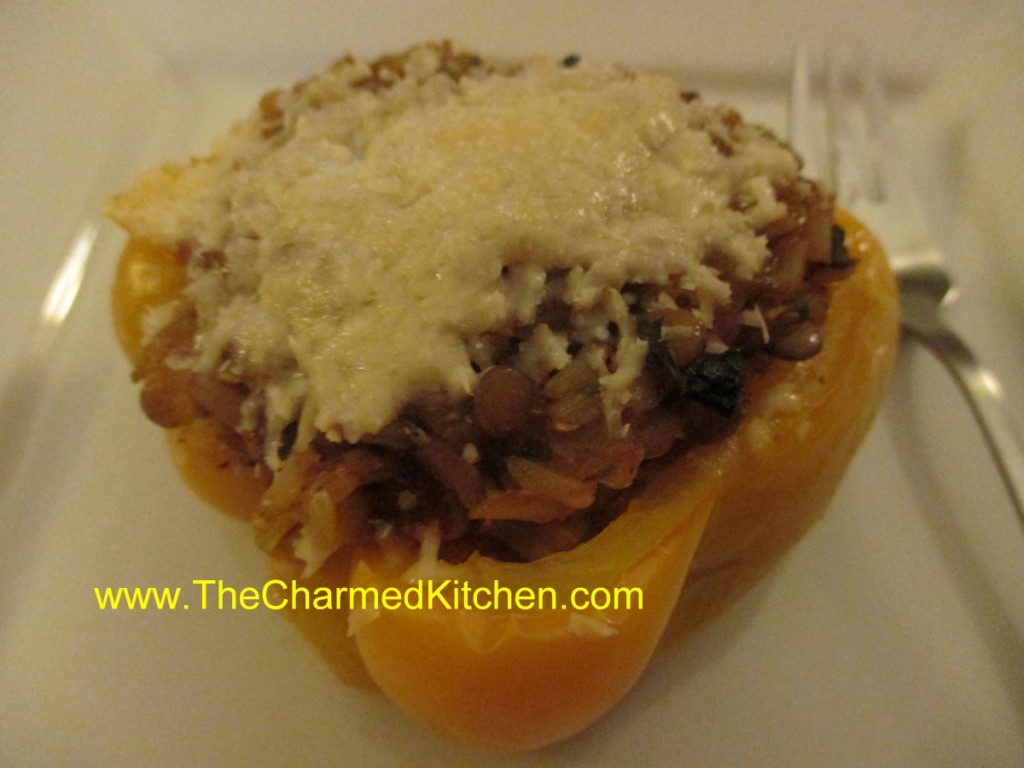
Lentil and Brown Rice Stuffed Peppers
1 onion, chopped
Oil
¾ c. uncooked brown rice- I used brown jasmine rice
Water or vegetable stock – probably around 3 cups or a bit more
¾ c. lentils, rinsed and drained
2 c. peeled and chopped fresh tomatoes- or 2 c. canned tomatoes
2 – 3 sweet peppers, cut in half and seeded
3 garlic cloves, peeled and chopped
2 T. apple cider vinegar
¼ c. chopped parsley
1 T. fresh oregano or 1 t. dried
1 t. chopped rosemary
Hot sauce to taste
Salt and pepper to taste
Romano or Parmesan cheese- optional
In soup pot, heat oil and cook onion until it gets tender and a little golden. Add the rice and stir to coat the rice in the oil. Toast the rice a couple of minutes. Add 2 cups stock or water to cover the rice, and then bring up to a simmer. Reduce heat and cook, covered, for about 20 minutes. While rice is cooking, place the peppers in a pot of boiling water and cook for 3-4 minutes. Remove from heat and drain peppers. After the rice has been cooking for 20 minutes, add the lentils, garlic and tomatoes,vinegar and seasonings and continue cooking, covered, until the rice and lentils are tender, about 25 more minutes Add more stock, if needed. Rice mixture should be a little runny. Place peppers, cut side up in a shallow baking dish. Spoon in the lentil mixture, dividing it among the 4 pepper halves. Cover dish with foil and bake in a 350 degree oven for 30-40 minutes. Peppers will be tender. Serve as is – or top with some cheese and return to the oven until cheese melts- about 5 minutes. Makes 4 pepper halves.
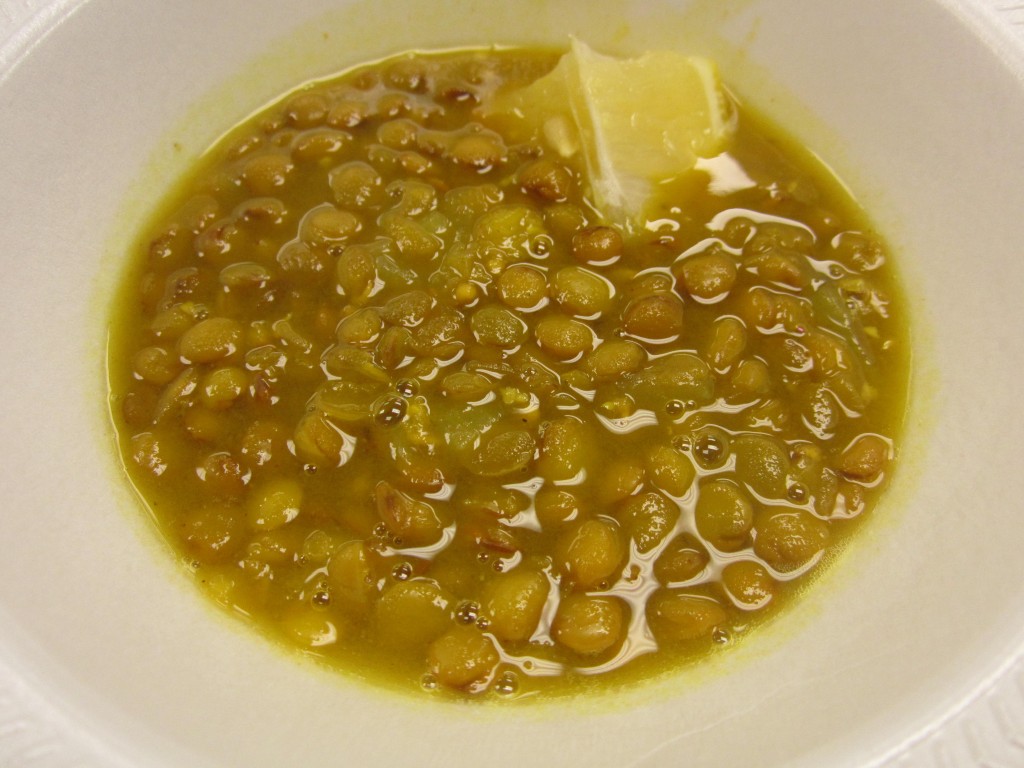
Red Lentil Soup with Curry
2 t. oil
1 large onion, chopped
2 cloves garlic, minced
6 c. stock- I used chicken, but veggie stock would work
2 c. red lentils
1-2 T. curry powder – add according to your taste
2 t. turmeric
Salt and pepper to taste
Sesame oil
Basil, cut into thin strips
Cashews
Heat oil in stockpot and cook onions until golden brown. Add the garlic and cook another couple of minutes. Add stock and heat to a boil. Rinse lentils and add to the pan. Cook at a simmer, covered, until lentils are soft- about 20 minutes. Add seasonings and adjust to your taste. Puree soup until smooth. Thin soup with additional stock or even water, if needed. Ladle soup into bowls and top each with a drizzle of sesame oil, some basil and a few cashews. Serves 4-6.
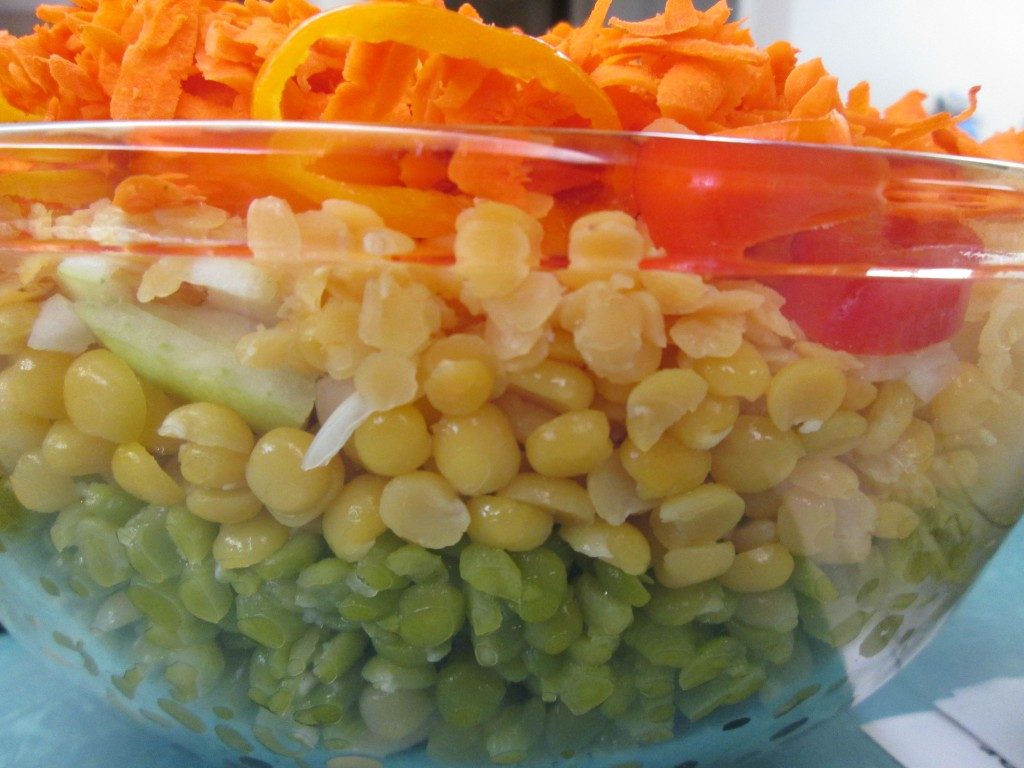
Rainbow Salad
1 c. each green split peas, yellow split peas and red lentils
1 can black beans, rinsed and drained
1 can butter beans, rinsed and drained
1 c. diced sweet onion
1 c. diced sweet pepper
1 c. grated carrot
Cook split peas and lentils separately just until tender. Split peas, both green and yellow will take 20 minutes. Red lentils will take about 8-10 minutes. Drain and rinse each under cold water when done and set aside until ready to use, or you can cook them a day ahead and keep chilled. Each will yield about 2 1/2 c. cooked.
In large glass bowl, place the following ingredients in this order.
Black beans, butter beans, green split peas. yellow split peas. onion, red lentils. carrots and peppers. Pour over dressing and chill several hours or overnight. Serve on a bed of greens. You can also leave the salad plain and serve dressing on the side.
Dressing *
1/2 c. oil
1/2 c. vinegar, I like apple cider vinegar or red wine vinegar
1 (14 oz.) can diced tomatoes, undrained
2-3 T. sugar
1/2 c. parsley or cilantro
1 t. each chili powder, cumin and salt
dash hot sauce
Combine in a blender or food processor until smooth.
*Note: Any fresh or bottled dressing you like can be used. Balsamic works very well. I often serve it with homemade Italian dressing.


Posted in Cooking | Tagged beluga lentils, black lentils, chili bean spoon bread, dal soup, French lentils, lentil, lentil and brown rice stuffed peppers, Lentil and vegetable soup recipe, lentil chili recipe, lentil recipe, lentil salad recipe, lentil soup, lentil soup recipe, Mad Greek Lentil Soup recipe, red lentil recipe, types of lentils, vegetarian bean salad, vegetarian taco
Spinach and Cheese Bread


I love these filled breads. They aren’t hard to make, and everyone seems to love them. They are filled with a combination of spinach, feta and Mozzarella cheese. They can be served as an appetizer or as a main dish. You can play around with what cheeses you use. I sometimes add Parmesan instead of the feta.
Because you can swap out the fillings, you can make them to suit most any taste. I have a list of some other filling ideas at the bottom of this post.
While there are two loaves in the picture, that is because I doubled the recipe. The recipe makes one loaf.
I have made this recipe with plenty of different fillings. This just might be one of my favorites. Always fun for parties. Great served with a bowl of soup.
Spinach and Cheese Bread
3¼ c. all purpose or bread flour
1 T. sugar
1 t. salt
1 package quick-rising yeast
1 c. hot water
1 T. oil
Filling:
1 (10 oz.) package frozen spinach, thawed and squeezed dry
1½ c. shredded mozzarella cheese
1 c. crumbled feta cheese
2 T. chopped parsley
1 T. lemon juice
2 t. hot sauce, or to suit your taste
Grease a large jelly roll pan and set aside. Place a shallow roasting pan on the stove and fill halfway with water. Start heating the water up. You’ll need it later.
Prepare filling: Take spinach and place in a medium bowl. Combine it with cheeses and remaining filling ingredients. Use your hands and squeeze the ingredients together, partly to mix them up well, but also to get them to stick together a little. Set aside and prepare the dough.
Set aside 1 cup of the flour. Combine remaining flour with the other dry ingredients in a medium bowl. Stir in water and oil and gradually stir in enough flour to make a soft dough. Turn onto lightly floured surface and knead until dough is smooth and elastic, about 5 minutes. Roll dough into a rectangle about 16 x 8 inches in size. Spread spinach mixture down center of dough. Squeeze it a little, sort of in a tube shape. You need to fold the dough over this mixture, so pressing it together helps with the next step. Cut one-inch wide strips of dough from filling to edge on both sides. It will sort of look like fringe. Alternating sides, fold strips up and over the filling at an angle. Pinch the ends. Carefully lift loaf onto greased jelly roll pan and place at an angle, so it will fit. Cover with a towel, and place the jelly roll pan on top of a roasting pan, half-filled with simmering water for 15 minutes. Because quick-rising yeast is more heat tolerant, the simmering water helps the dough to rise faster. After 15 minutes, remove towel and place jelly roll pan in oven. Bake in a preheated 375-degree for 20-25 minutes, or until golden brown. Cool slightly before slicing. Serve warm and refrigerate leftovers.
Bread can be baked ahead of time and reheated later. To reheat: Wrap in foil and place in a preheated 350 degree oven for about 25 minutes. Loosen the foil after 10 minutes so the bread does not get soggy.
Note: The variations for this bread are almost endless. Some favorite combinations are ham and Swiss with mustard, roast beef and cheddar, chicken, broccoli and cheese, pizza with assorted fillings. You get the idea. I am also making a Reuben loaf later. Use your imagination and have fun. Just be careful not to overfill, or the bread will be hard to move, use fillings that aren’t too runny and always use cold fillings. Warm fillings will make the dough soggy before baking.
If you want to use regular yeast, in place of quick rising yeast, use warm, rather than hot water. Also, don’t let dough rise over boiling water. After kneading cover dough and let rise 45 minutes. Punch down and assemble as in original recipe. Cover with a towel and let rise until dough looks puffy, about 40 minutes. Bake as directed above. These breads can also be frozen.
Italian Wedding Soup


I love this soup. I’ve had different versions over the years, but they all have those wonderful little meatballs in common. This recipe came from the mother of a dear friend. I still have her handwritten copy in a file. Every time I make this soup I think of her.
When I made this soup the other night, I used spinach. It’s what I had, so its what I used. It was very good and I got no complaints. I still prefer endive, but there is room for using different greens, depending on your preferences and what you can get.
Italian Wedding Soup
Meatballs:
3/4 lb. ground beef or a mixture of beef, pork and veal or turkey
1 egg, beaten
1/4 c. dry bread crumbs
2 T. grated Parmesan cheese
1 T. dried parsley or 3 Tablespoons fresh chopped parsley
1/4 t. salt
1/4 t. garlic powder or 2 cloves of minced garlic
1/4 t. each pepper and dried oregano
1 T. oil
Soup:
8 c. chicken stock, not too salty
1 c. thin sliced carrots
1 c. thin sliced celery
1/2 c. thin sliced green onions, optional
1/2 t. dried basil or 1 1/2 t. fresh chopped
1/2 c. uncooked small pasta, I like Acini di Pepe or orzo
1/2 lb. escarole or kale, cut in thin strips
To make meatballs combine all ingredients except the oil and form into 50 tiny balls. Sauté in oil until browned on all sides. Drain. In large saucepan combine broth with vegetables. Bring to a boil and simmer, covered 10 minutes. Add basil, pasta, meatballs and escarole or kale and simmer 10 minutes longer. Serves 6-8.
Note: you can use spinach instead, but add for last 5 minutes of cooking.
Classic Carrot Cake

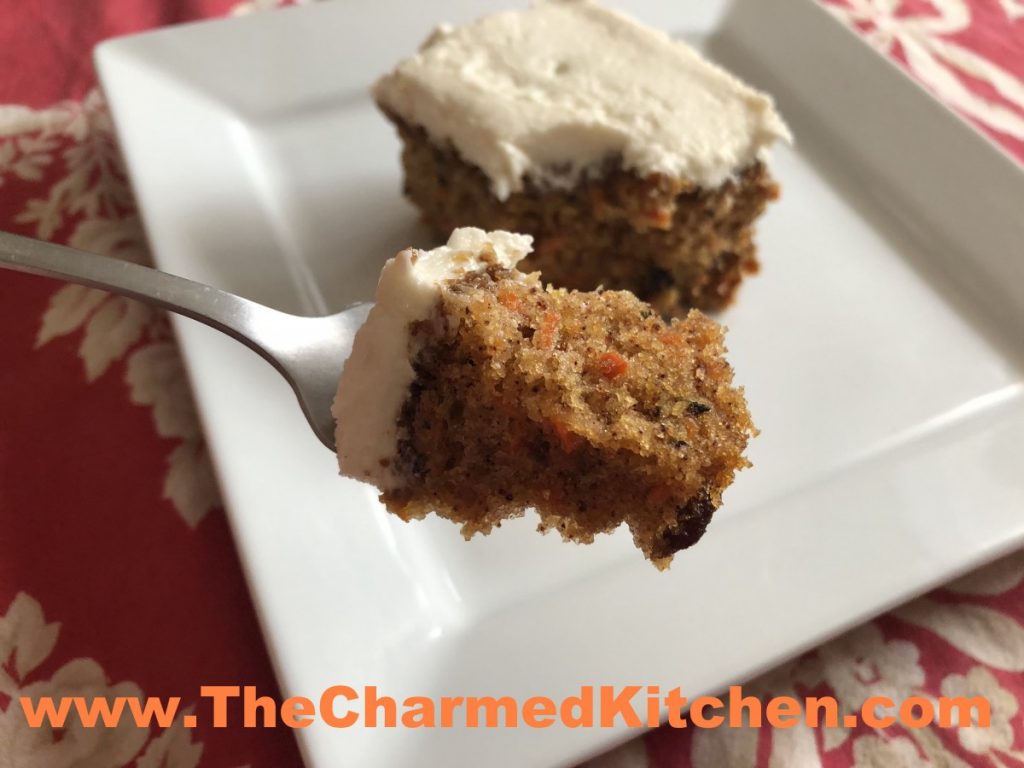
I can’t remember the first time I had carrot cake. I do know that I loved it. Carrot cake is a timeless dessert that never goes out of style.
It is a simple cake, but full of flavor from cinnamon, vanilla and three cups of shredded carrots. The carrots add both flavor and moisture to the cake. Plus, with all those carrots, it’s like dessert and a veggie all in one. Practically health food.
It seems like a long time since I baked a carrot cake. Too long. Since i got a big bag of carrots a few days ago, it seemed like the right time to bake one.
I baked the cakes this morning. I only made one recipe, but instead of baking the cake in one 9×13-inch pan, I used two (8×8 -inch) pans. Baking time was about 5 minutes less. Once the cakes cooled down, I frosted them with cream cheese frosting – recipe follows. Now I have two carrot cakes. One to share with a neighbor and one to freeze for another time.
So here is the recipe. I hope you love it as much as I do.
Classic Carrot Cake
4 eggs
2 c. sugar
1½ c. oil
3 c. shredded carrots
2 t. vanilla
2 c. flour
2 t. each baking soda and cinnamon
1 t. salt
1 c. nuts
1 c. raisins, optional – I don’t always add them.
Preheat oven to 350 and grease a 9×13-inch pan. Beat together eggs sugar and oil until smooth. Stir in carrots. Combine flour with dry ingredients and beat in. Stir in nuts and raisins, if adding, and pour into prepared pan. Bake 35-40 minutes or until toothpick inserted in center comes out clean. Dust with powdered sugar or frost with cream cheese frosting.
Frosting recipe:
8 oz. Cream cheese, softened
3/4 c. powdered sugar
1 stick butter, room temperature
Beat all together until fluffy. Frost cake and refrigerate until ready to eat.
Spelt Bread

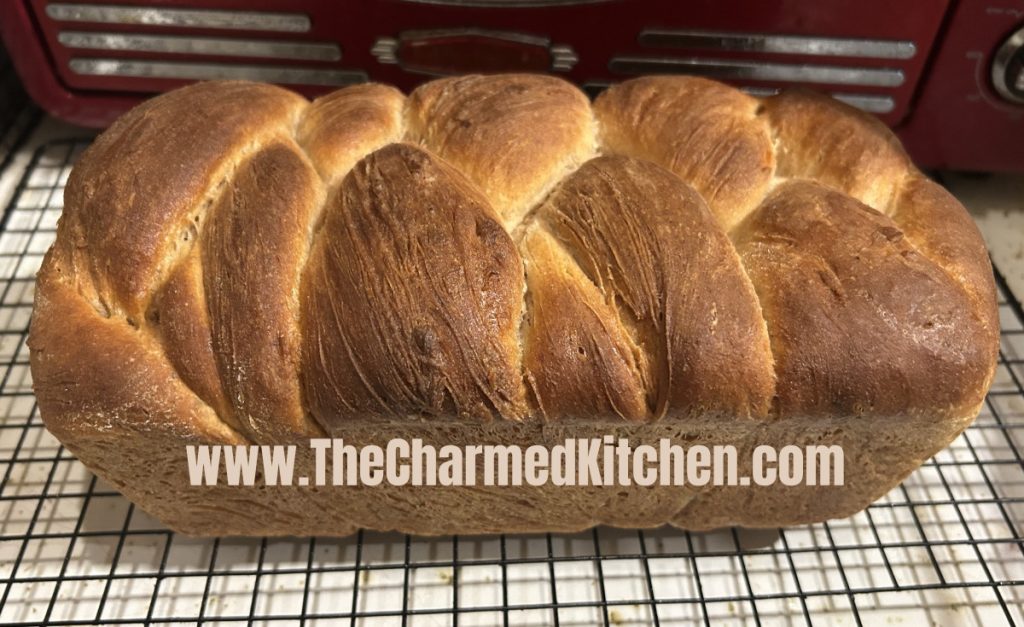
There is just something about homemade bread. I love the way the house smells when bread is baking. I decided to bake some spelt bread last night. It is one of my favorites.
I always have at least a few people who ask me what spelt is.
Spelt flour is a close relative to wheat. I love cooking with it because it is so easy to work with. It doesn’t require much, if any, kneading when you make yeast bread out of it.
Spelt has a texture much closer to white flour in baking other recipes, like muffins or biscuits. It does contain gluten, so it’s not an answer for people with gluten issues.
For those who do cook with wheat, spelt provides whole grain nutrition in a delicate, less heavy package. The bread I baked was so easy to make and gives me all the taste and fiber of whole wheat bread with less work.
Spelt flour is still tricky to find. Some larger grocery stores carry it, but you might have to go to specialty markets. Bob’s Red Mill is my usual source, so if your store carries their products, you should be able to locate it. You can also buy it online.
Spelt Bread
3 ¼ c. spelt flour
1 pkt. Active dry yeast
1 c. water
1/3 c. honey
¼ c. oil
1 t. salt
1 egg
Place 2 c. flour, yeast and salt in a medium bowl. Heat together water, honey and oil until warm (120-130 degrees) Add water mixture to spelt mixture and beat on low speed of electric mixer for 30 seconds, or until moistened. Add egg and beat on high 3 minutes. Stir in enough spelt to make a soft dough. Cover bowl with towel and allow to rise until doubled, about 1 hour. Grease a 9×5 inch loaf pan and set aside. Use a rubber scraper to transfer dough to a lightly floured surface. Divide dough into three pieces and roll each piece into a 12-inch rope. Braid the ropes together, pinch ends to seal. Place into prepared pan. Cover and let rise until doubled, another hour. Bake in a pre-heated 375 degree oven for 25-30 minutes. Cover top with foil during last 10 minutes of baking. Bread is done when it sounds hollow when lightly tapped. Remove from pan and cool on wire rack. Makes 1 loaf.
The Gentle Art of Biscuits


Biscuits are easy to make. They really are. Fast, too. You can mix up a batch of biscuits in the time it takes the oven to preheat. Yet, I know people who seem to struggle with them. With a couple of friends recently, we talked about the secret to a light and flaky biscuit.
So what goes wrong? How do you make light, flaky biscuits every time?
For the moment I’ll assume you have a decent recipe. There are a lot of great biscuit recipes out there. I know people that have treasured family recipes. Biscuits that have been made the same way for generations.
Assuming also, that the baking powder is fresh*, there has to be some other reason that some folks just seem to struggle with biscuits.
The problem is, more than likely, over-mixing the dough. When I talk to someone who tells me that their biscuits are always heavy or tough, I first ask about how they are put together. Less is more, when it comes to biscuits. Less handling of the dough, more tender the biscuits.
Once the dry ingredients have been mixed and the fat cut in, there is just liquid to be added. I prefer to chill whatever fat I am using.
At this point the dough should be handled just enough to hold together. A light hand means a light biscuit. The same is true for making scones. The more you knead the dough, handle the dough and roll the dough, the less flaky biscuits become. Be gentle with your dough.
Don’t treat biscuit dough the way you would a yeast-based dinner roll. The two are very different in how they are handled. Yeast-based doughs benefit from kneading and “working” the dough. Biscuits are the opposite.
Even when cutting out the biscuits, it will help if you cut them out as close together as you can. That way you have fewer scraps to re-roll. Every time you roll the dough out- it becomes a little tougher. You can always roll or pat your dough into a square and cut out the biscuits into triangles, leaving no scraps and no re-rolling.
Here is a recipe for one of my favorite biscuits. They are light and very flaky. Is there anything better than a fresh, warm biscuit with some butter?
Biscuits Supreme
2 c. flour
4 t. baking powder
2 t. sugar
½ t. cream of tartar
½ t. salt
½ c. cold butter, shortening or coconut oil – you can even use lard
2/3 c. milk
Stir together dry ingredients and cut in butter to resemble coarse crumbs. Make a well in the center and add milk all at once. Stir until dough sticks together and knead on lightly floured surface 10-12 strokes. Roll or pat to ½ inch thickness. Cut with 2-21/2 inch biscuit cutter and place on ungreased baking sheet. Bake in 450-degree oven for 10-12 minutes. Serve warm. Makes 10-12.
Note: I made two batches of these biscuits with friends. One with butter and the other with shortening, to compare them side by side. Both handled and rose perfectly. A few people said the shortening biscuits were flakier. I make no judgements about what fat you choose to use in your biscuits. I use butter most often, unless I am serving them to someone who doesn’t eat butter/dairy for some reason.
*If your baking powder might be old, you can test it. Place a couple of tablespoons of boiling water in a cup. Add a teaspoon, or two, of baking powder. The mixture should bubble vigorously. If there are no bubbles, or very few bubbles, you might want to get a new container of baking powder.
Classic Pecan Pie

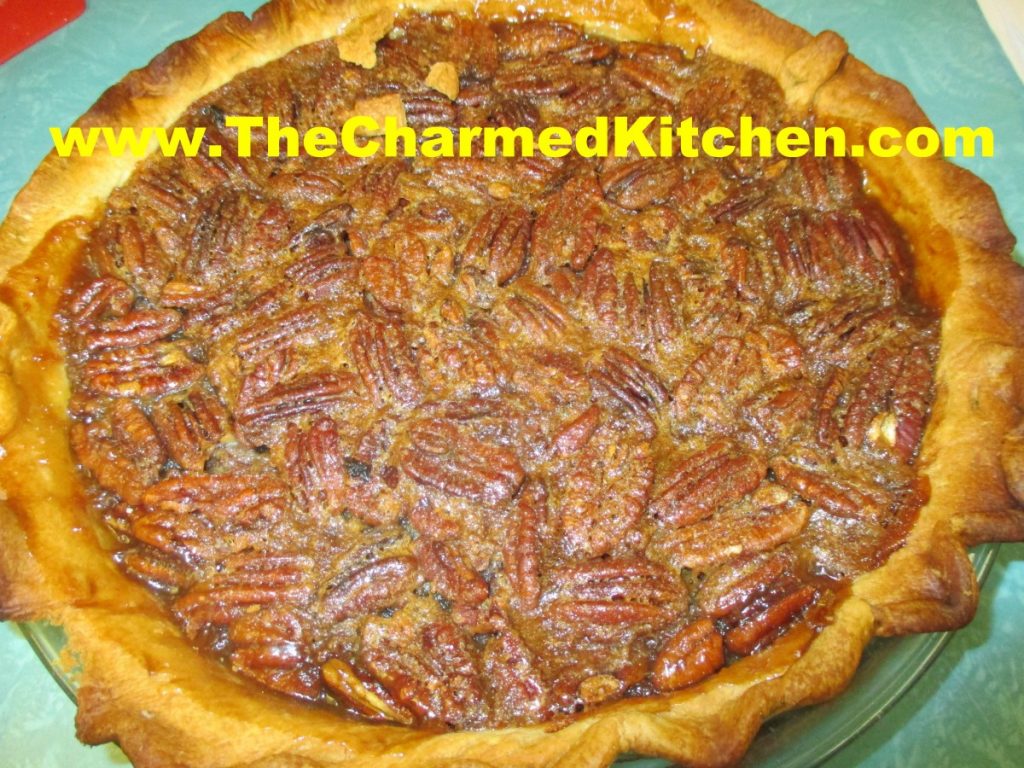
I love all sorts of pies. I would never want to pick just one favorite. If I had to pick, pecan would probably be it. The nuts, the sweet, gooey filling and the crispy crust all work so well together.
Served plain, or with a dollop of whipped cream, pecan pie just works for me. It is not a pie I make very often, so I think pecan pie always makes me thinks of the holidays. It was also a favorite of my Mom’s.
Here is the recipe. The crust recipe follows. There is also a variation for chocolate pecan pie.
Classic Pecan Pie
3 eggs, slightly beaten
1 c. light or dark corn syrup
1 c. sugar
2 T. Butter, melted
1 t. vanilla
1½ c. pecans
1 unbaked 9-inch pastry crust
In medium mixing bowl beat together all ingredients, except the pecans until well mixed. Stir in nuts and pour into crust. Bake in a preheated 350 degree oven for 50-55 minutes or until knife inserted off center comes out clean. Makes 1.
Chocolate Pecan Pie Variation: The same recipe as above, but reduce sugar to 1/3 cup and add 4 oz. of German sweet chocolate or semi sweet chocolate, melted and cooled along with the eggs. This pie sometimes needs a little more time to bake-5 minutes or so.
Variations: You can experiment with other nuts. Try toasted, skinned hazelnuts, chopped coarsely or walnuts, slivered almonds or a combo.
You can use a store bought crust, but I prefer homemade. This is the crust recipe I normally use when I make pecan pie. It makes two crusts, so you can cut the recipe in half, freeze half of the dough, or just make 2 pies!!!
Half and Half Dough
This is a great crust for liquid fillings like custard type pies, pecan and pumpkin. For a sweet pie, like pecan, you can reduce the sugar in the crust by half.
¼ c. butter, room temp
½ c. lard or shortening, room temp
¼ c. sugar
½ t. salt
2½ c. pastry or all purpose flour
1/8 t. baking powder
¼ c. milk
1 t. lemon juice
Cream together the first 4 ingredients until smooth. Mix together the flour and baking powder. Set aside. Combine milk with the juice and set aside. Stir ½ c. of the flour into butter mixture. Stir until smooth. Add a little of the milk, stirring until smooth. Add remaining ingredients alternately until finished. Dough will firm up once chilled. Chill at least 4 hours before using. Makes 2 crusts.
Lemon Poppy Seed Scones

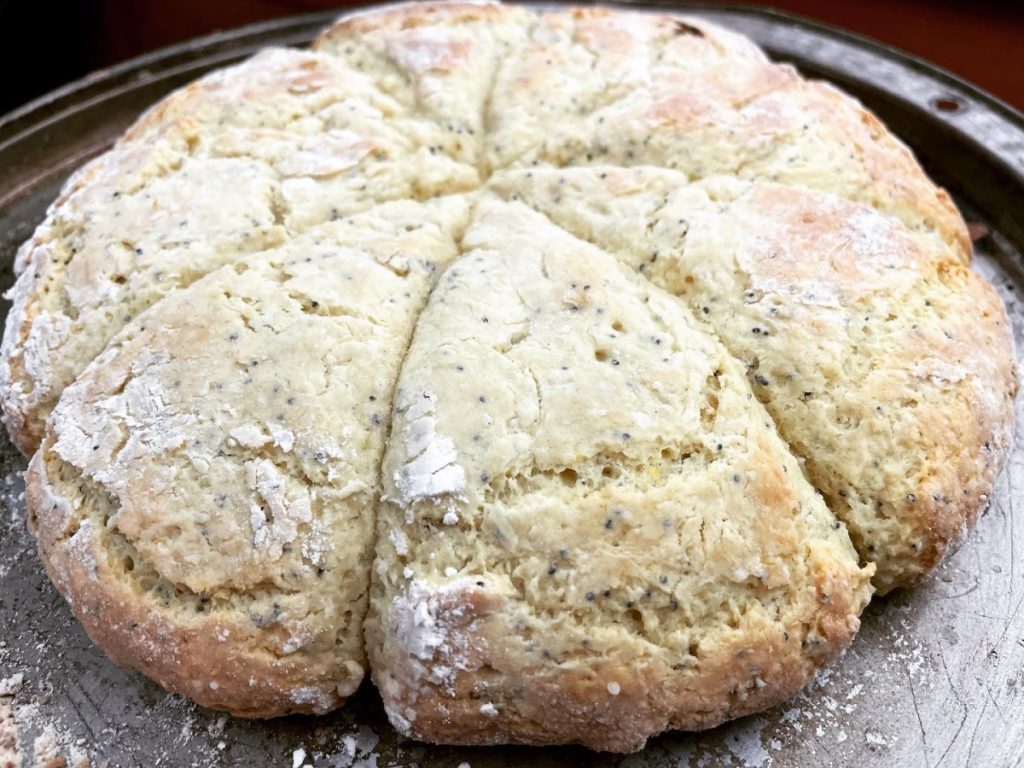
This recipe is a variation on a classic scone recipe that I bake often. The addition of poppy seeds and lemon add a nice flavor and texture to the scones. They rose beautifully and were crisp on the outside and tender in the middle. The secret to a good scone is not to over mix the dough. Handle the dough as little as possible once the dough comes together.
Lemon Poppy Seed Scones
2 c. flour
2 T. sugar
1 T. poppy seeds
2 t. baking powder
1 t. baking soda
½ -1 t. Lemon zest
½ t. salt
¼ c. butter, cut up
2/3 c. buttermilk
1 egg
Topping
2 T. sugar
1 T. lemon juice
Mix together sugar and lemon juice and brush on hot scones.
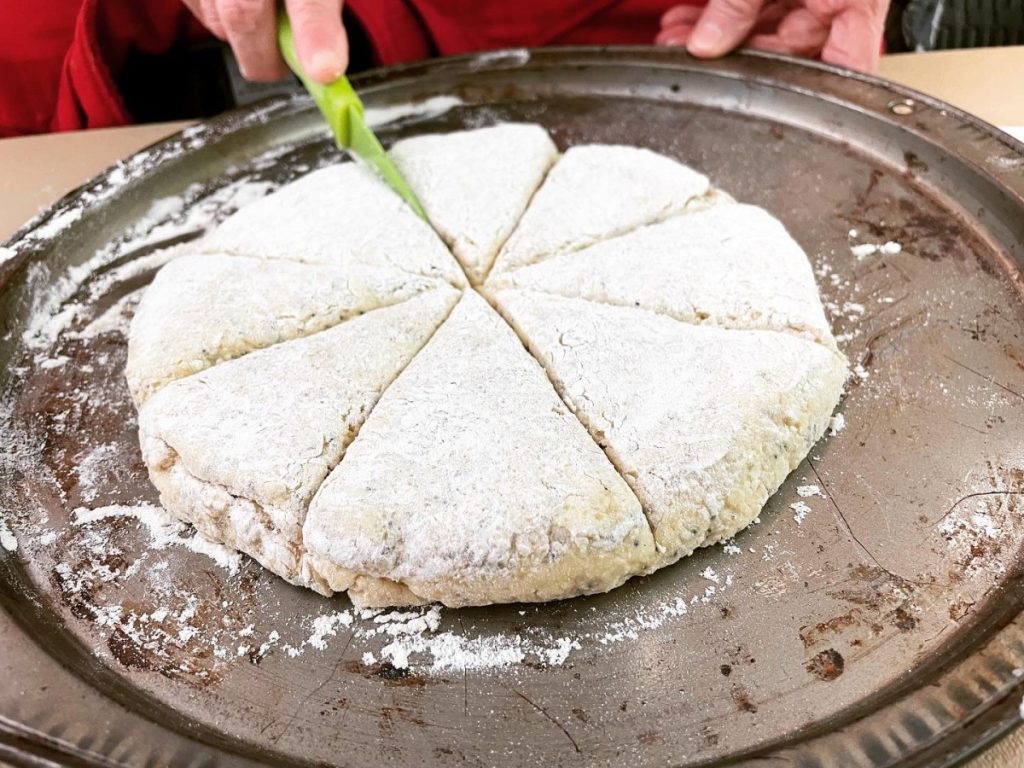
Preheat oven to 425 degrees and lightly grease a baking sheet or line with silicone baking mat. Combine dry ingredients in medium bowl and cut in butter to resemble coarse crumbs. Beat together milk and egg and add to flour mixture, stirring with fork until just coming together. Turn onto floured surface and knead 5-6 strokes or until ball of dough holds together. Transfer dough to prepared sheet and with floured hands, press dough into an eight-inch circle. To get a perfect circle, dust an 8-inch round cake pan with flour. Press dough into the pan, then quickly turn the pan over onto the prepared baking sheet. Remove cake pan. With a sharp, floured knife cut dough into 8 wedges. Bake 14-16 minutes. Makes 8.
Dough can also be patted out on work surface and cut into circles or pressed into a square and cut into smaller squares.
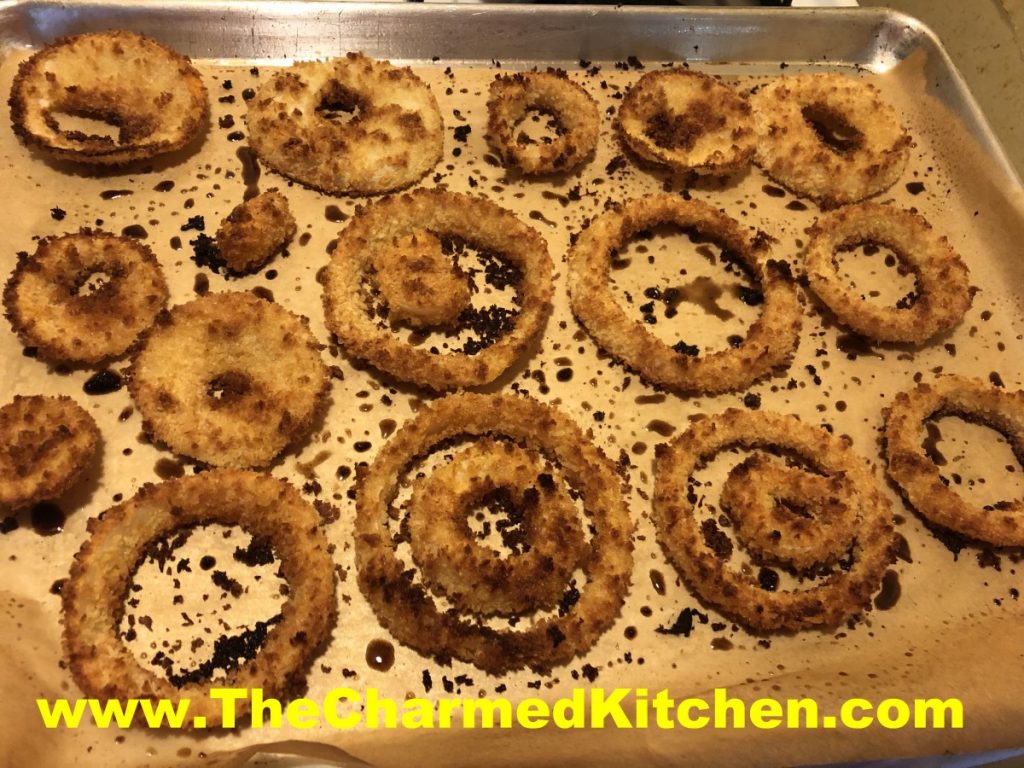
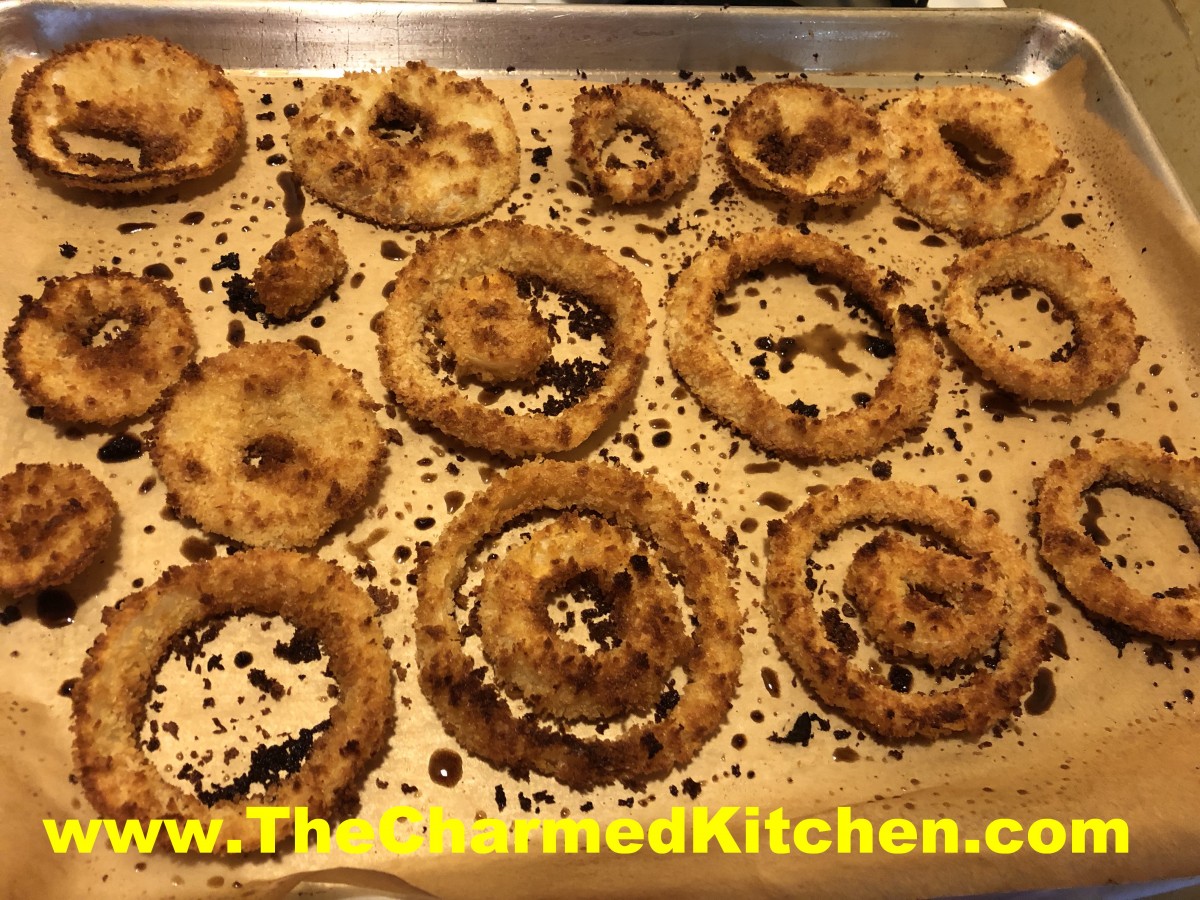
Extra Crispy Baked Onion Rings


These onion rings are fabulous. They have all the crunch of traditionally fried onion rings, without frying!!! The secret is panko bread crumbs and a very hot oven.
I’ve tried baking onion rings before. They were good, but not great. The panko adds more texture than other bread crumbs add. This gives you pretty crunchy onion rings.
The 450 degree oven is a must, too. You need really high temps for this to work.
I used a Vidalia onion and it worked great, but you can use any large onion. Sweet onions are my first choice, but even a big yellow onion will mellow out when cooked.
The drizzle of oil is a must, too. You can just give them a spritz of your favorite non-stick baking spray. Or use a spoon to drizzle them lightly with oil before baking. Because of the high heat- I used avocado oil.
I used the same recipe to make baked zucchini slices, too. They came out great as well.
Before someone asks. Can these be done in an air fryer? I am sure they can. Since I don’t have an air fryer I can’t give you exact direction. An air fryer is basically a higher speed convection oven, so you would set the temp lower and watch your time. If someone makes these in an air fryer please elt me know so I can share your results.
Here is the recipe. I hope you try it.
Extra Crispy Baked Onion Rings
1 large onion- sweet preferred
½ c. flour
1 t. salt
½ t. pepper
¼ t. smoked paprika
2 eggs
2 T. water
About 2 cups panko bread crumbs
Oil or non-stick cooking spray
Extra salt
Preheat oven to 450 degrees. Line a large baking sheet with parchment paper and set aside. You might need a second one. Peel onion and slice into ½-inch thick pieces. Separate into rings. In a bag, combine the flour with the salt, pepper and paprika. In a bowl, beat together the eggs and water. In a second bowl, place the panko crumbs. Place a few of the onion rings in the bag of flour and shake to coat evenly. Remove from the bag, tapping off excess flour. Place rings in the egg mixture next, turning to coat them completely. Last step is placing the egg-dipped onion rings in the bread crumbs and turning to make sure they get coated evenly. Place onion rings on the prepared baking sheet and continue the procedure until all the onion rings are breaded. To save space, you can place smaller onion rings inside of the larger ones. Drizzle with a little oil, or spray with non- stick coating. I have this pump-bottle thing that lets me spritz oil on stuff. If you are drizzling oil, put a tablespoon or two in a bowl, and use a spoon to drizzle the oil all over the onion rings. Bake for 15-20 minutes, or until golden brown. You can turn them over after 10 minutes, for a more even bake. Remove from oven and sprinkle with a little more salt before serving. Serves 3-4 depending on the size of the onion.